Deploy your Ghost blog using volumes in tutum
So far we’ve been running our containers from the command line - it works fine, but you have to SSH and do your complicated stuff there… we can make it better! Tutum is a service I’ve been following for a while, and they recently introduced a much antecipated feature: they now support volumes.
If you’ve forgotten, volumes are directories shared with the host outside of the container’s filesystem - that is, volumes are not subject to the container usual versioning and persist when the container is terminated (but not when it’s removed). They can also be shared between multiple containers, which make them ideal for data persistence. You can find more about containers here.
Think of tutum as your own personal Docker cloud: you can manage machines from DigitalOcean, Amazon Web Services, Microsoft Azure, and pretty much any Ubuntu machine you have root access to. It adds a lot to your Docker workflow - you get autoscaling, easier server management, auto restarts on fail, automatic deployment… and the best of all: integration with Docker’s Registry, so when you commit code changes to your Git repository the image can be automatically rebuilt and deployed!
In my case I want full control of the host machine (with SSH access), so I’ll start with a basic Ubuntu 14.10 image from DigitalOcean and install tutum’s daemon there. You can, of course, just have tutum automatically create nodes for you on demand and enjoy the easy scaling.
Don’t forget to add your SSH keys when creating the droplet!
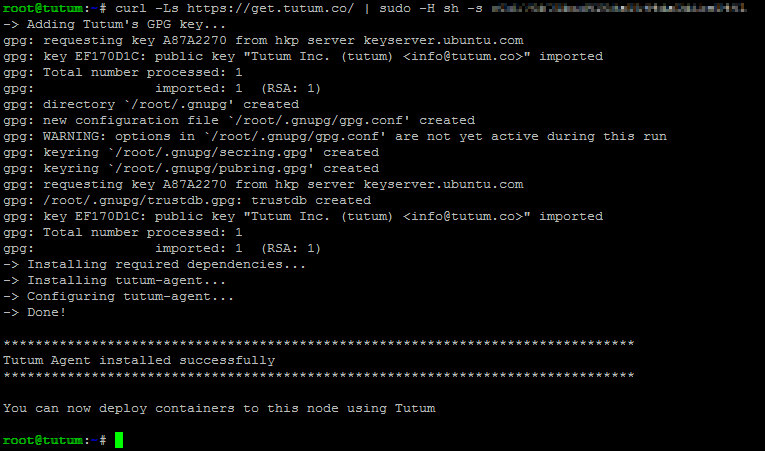
After logging in to your new server, go to your tutum dashboard and click ‘Bring your own node’. This will give you a curl command to run, which will install the agent that makes all the magic possible.
If you run
docker psright after the node has been deployed in tutum, you’ll see a bunch of tutum/* containers running. Those are necessary to provide the cools stuff like resource monitoring for each node, which you can see in the dashboard.
From there, we can create our first service. We’ll start by using dockerfile/ubuntu to create our data-only container and a data volume: Choose “Create your first service”, search for the image on the available public images. Call it “data-container”. You don’t need to set any of the advanced options or the environment variables, but do set /data as a container path and /docker/data as a host path on the volumes config.
Remember to create the folder
/docker/dataon your host first!
Create the service and start it - it will be deployed and then shown as ‘running’, after which you can stop it (do not remove it or you’ll lose your volume if no other container is using it!).
We can now deploy Ghost, our blogging platform. We’ll use the dockerfile/ghost image, call it ‘ghost’, set it to auto restart, and on the volumes configuration “add volumes from” our data-container service. We’ll also add /docker/blog from the host as /ghost-override, which contains our custom themes and configuration files.
Make sure your /docker/blog folder actually exists on the host, create and deploy the service.
Next we’ll run a nginx proxy to our blog, using dockerfile/nginx. Create a new service, mark port 80 as published to host port 80 (also do it with port 443 if you are using https), link it to your Ghost service, and add /docker/nginx/sites-enabled from your host to /etc/nginx/sites-enabled in your container.
You can leverage the host file to write your sites-enabled config:
server {
  listen             80;
  server_name        blog.marcelofs.com;
  location / {
    proxy_pass       http://ghost:2368;
  }
}
Want nginx to cache your Ghost blog? Start here.
We can then migrate our old data to the new blog, by copying /docker/data/blog.db to the new host and redeploying the Ghost service. Do notice that this will redeploy the nginx service as well, because of the link between the containers.
And there you go, simple as pie! tutum will also provide you with a custom view of cAdvisor that will let you keep an eye on resource usage for both the host and each running container.

